
Reference
- If you want to use the Report Wizard to create a new report, refer to "Using the Report Wizard".
- If you want to edit an existing report and save it as a new report, refer to "Loading an Existing Report".
This topic describes how to create a completely new report.
|
|
|
Reference
|
To create a new report:
Micronet displays Report Generator - (Untitled) screen.

|
|
Field |
Value |
|
|
Name |
This is the filename for the new report. Each report must have a unique name. This remains as (Untitled) until you save the report. |
|
|
Group |
If the report belongs to a specific report group, enter the group name. The group name determines the report’s functionality (e.g. INV for an invoice), allowing you to select from a number of reports with the same group name when executing the report. It also determines the report's location in the menus. For example, if a report begins with "USER", it will be listed when a user selects REPORTS | USER REPORTS. |
|
|
File |
Select the base or core Micronet data file which contains data necessary to produce the report. It must also provide linkage or have a relationship to other data files which contain the data necessary to produce the report. |
|
|

|
Technical Tip The selection of the base data file is also influenced by the index to be used on the report. For example, to do a sales history inquiry on items, the Debtors Invoice Line file becomes the base file and the item index is selected. |
|
|
Description |
Enter a description of the report (the report title). |
The first step to creating a report is to define the line types, as they control the report layout. Fields are then added to these line types.
Refer to "Defining the Report Layout"
The next step is to add the relations (data files) which are used in the report and have a relationship with the base file.
Relations can be added to the relation list and can expand like a tree structure. For example, the debtors invoice header relation is linked to the debtors invoice line relation, and the debtors invoice line relation links to the debtors invoice serial file.
Refer to "Options - Relations".
You can add the following field types to any line type of the report except for the question line type:
Refer to "Edit - Add Field".
Data on reports can appear in any order required. There are two methods of sorting information:
Refer to "Options - Index" and "Options - Sort".
There are two ways to select which records to include or exclude from being displayed on the report:
Refer to "Options - Detail Selection".
These are questions which are asked at the start of report execution. For example, prompting for a range such as:
Refer to "Report Header Questions".
Miscellaneous tasks include:
Refer to "Options - Control Breaks", "Options - Blank Lines", "Options - Options" and "Options - Fonts and Margins".
Refer to "Report Generator - Compile".
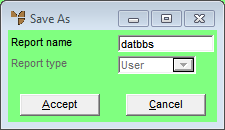
Micronet displays the Save As screen.
|
|
Field |
Value |
|
|
Report Name |
Enter a name for your new report. |
|
|
Report Type |
Select the report type. Options include:
|
Micronet saves the report and displays it in the Report Generator screen.